Hello everybody, I hope you are having an incredible day today. Today, I will show you a way to prepare a special dish, peas pilau & khichuri (rice with red lentils) #myrendangisntcrispy. It is one of my favorites food recipes. For mine, I will make it a little bit tasty. This will be really delicious.
Peas Pilau & Khichuri (rice with red lentils) #myrendangisntcrispy is one of the most well liked of current trending foods on earth. It is enjoyed by millions daily. It’s easy, it is fast, it tastes yummy. They are fine and they look wonderful. Peas Pilau & Khichuri (rice with red lentils) #myrendangisntcrispy is something which I have loved my whole life.
If using frozen peas, put them in a strainer and rinse with cool water. See great recipes for Pepper Peas pulao, Peas Carrot Pulav too! Peas pulao is a delicious one pot rice pilaf made with green peas, spices, herbs & basmati rice.
To begin with this particular recipe, we must prepare a few ingredients. You can cook peas pilau & khichuri (rice with red lentils) #myrendangisntcrispy using 26 ingredients and 2 steps. Here is how you can achieve it.
The ingredients needed to make Peas Pilau & Khichuri (rice with red lentils)
#myrendangisntcrispy:
- Get For Peas pilau:
- Make ready 2 cups basmati rice
- Get 1 cup fresh or frozen peas
- Get 1 tsp ginger garlic paste
- Get 2 tbsp ghee or butter
- Make ready 4 cardamoms
- Get 2 bay leaves
- Prepare 2 cinnamon sticks
- Make ready 1 medium size onion
- Take to taste Salt
- Take 3 cups warm water
- Prepare 1/2 cup milk (optional)
- Prepare For khichuri:
- Make ready 2 cups basmati rice
- Take 1 cup red lentils
- Take 1 tsp ginger garlic paste
- Prepare 1 tsp turmeric powder
- Make ready 1 tsp chilli powder
- Prepare 2 tbsp tomato paste
- Get 1 medium size onion
- Prepare 3-4 cardamoms
- Get 2 bay leaves
- Prepare 2 cinnamon sticks
- Take 2 tbsp ghee or butter
- Make ready 5 cups warm water
- Prepare to taste Salt
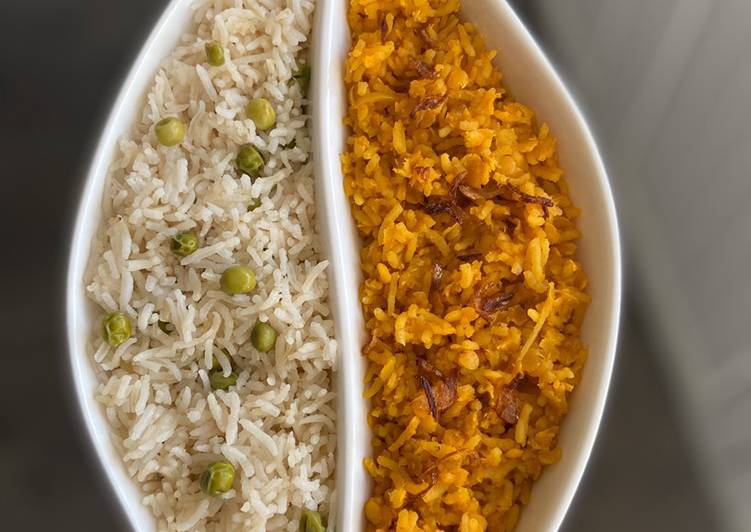
Peas pulao recipe With video and step by step photos - This tasty matar pulao is simple and easy to prepare pulao variety made in one pot. Peas and carrots with rice have never tasted so good! What Makes This Indian Pilau So Good? Steamed rice with green peas in the plate.
Steps to make Peas Pilau & Khichuri (rice with red lentils)
#myrendangisntcrispy:
- For peas Pilau: wash rice and then keep it in a bowl. Now in a pan pour ghee or butter. When the ghee is bit hot add cardamoms, cinnamon sticks and bay leaves. Fry them for few seconds. Now add onions and fry until light brown. Add ginger garlic paste. Cook for 1 minuet. Now add washed rice & peas and fry for 5 to 10mins. Then add water and milk. Add salt. Keep the flame in high until the rice starts boiling. Then put the lid on and keep the flame in low. Cook it for 12 to 15mins.
- For khichuri wash rice and red lentils together and keep them aside. Now in a pan pour ghee or butter. Fry cardamoms, cinnamon and bay leaves. Now add onions and fry until light brown. Then add all the spices. Cook them for few minutes. Now add rice and lentils. Fry them for couple of minutes. Add water and cook in high flame until they are boiling. Then put the flame in low and cook for 15 minutes.
Vegetable Pilau with Kadi or Indian Vegetable Biryani. Group photo of indian rice with green peas and garlic served with jeera. Serve with your favourite curry or green tomato dal or with cucumber raita. Preparation Lightly fry whole spices in the oil or butter. The Hairy Bikers' pilau rice is the perfect side dish for a curry feast.
So that is going to wrap this up with this special food peas pilau & khichuri (rice with red lentils) #myrendangisntcrispy recipe. Thank you very much for your time. I am confident that you can make this at home. There’s gonna be more interesting food at home recipes coming up. Don’t forget to bookmark this page on your browser, and share it to your loved ones, friends and colleague. Thanks again for reading. Go on get cooking!